For a while now it has become “mandatory” to use SSL certificates to get the green lock on HTTPS. In this post you’ll see how to automatically issue free SSL certificates with Let’s Encrypt and FreeSSL.tech on shared hostings running cPanel.
You can buy a SSL certificate with a low budget, but for a blog or a simple website it may be too much. Then came along Let’s Encrypt that enables you to issue free SSL certificates.
At this point most of the hosting companies already have Let’s Encrypt integrated in the control panel (cPanel or Plesk). Before you go any further, look for Let’s Encrypt on your control panel and if that’s available, just set it and forget it.
For the rare cases where Let’s Encrypt is not available (yes Namecheap, I have my eyes on you) there are two options:
- Issue and install the certificate manually to cPanel
- Install something that can do this for you like FreeSSL.tech
In the first case you can use SSLForFree to issue the certificate via Let’s Encrypt and then install it on cPanel. However, this comes with a few downsides:
- Let’s Encrypt certificates expire after 90 days, which means you must do this at least 4 times per year;
- The expire warning is issued 30 days before it expires, so either you deal with the emails or you’ll renew your certificates more than 4 times a year;
- Each time you want to issue a certificate you must prove you own the domain (either by setting up DNS records or uploading files to the server);
So, you can see this is a boring and time consuming process so the optimal solution would be to have something that did this automatically for you.
Hi FreeSSL.tech
FreeSSL is a PHP application, simple to install, with the single purpose of:
- Loop through all the domains and subdomains of the hosting account;
- For each one verifies if there is an SSL certificate and if it’s not expired
- Issue and automatically installs SSL certificates on cPanel;
The best thing is that you can install this on a shared hosting and use any control panel - although the automatic installation is only possible for cPanel accounts.

To install FreeSSL.tech go to their website and check the minimum requirements. At the time of this writing they are PHP 5.4, MySQL 5 / MariaDB 10, with the extensions OpenSSL, cURL and MySQLi. Once you have verified your server fulfills the requirements just head over to the download page and download it with Composer or download the ZIP file.
If you choose to download the ZIP file (which was what I did) just upload the ZIP to the server, extract it there, create a MySQL database and user and follow the steps of the installation guide.
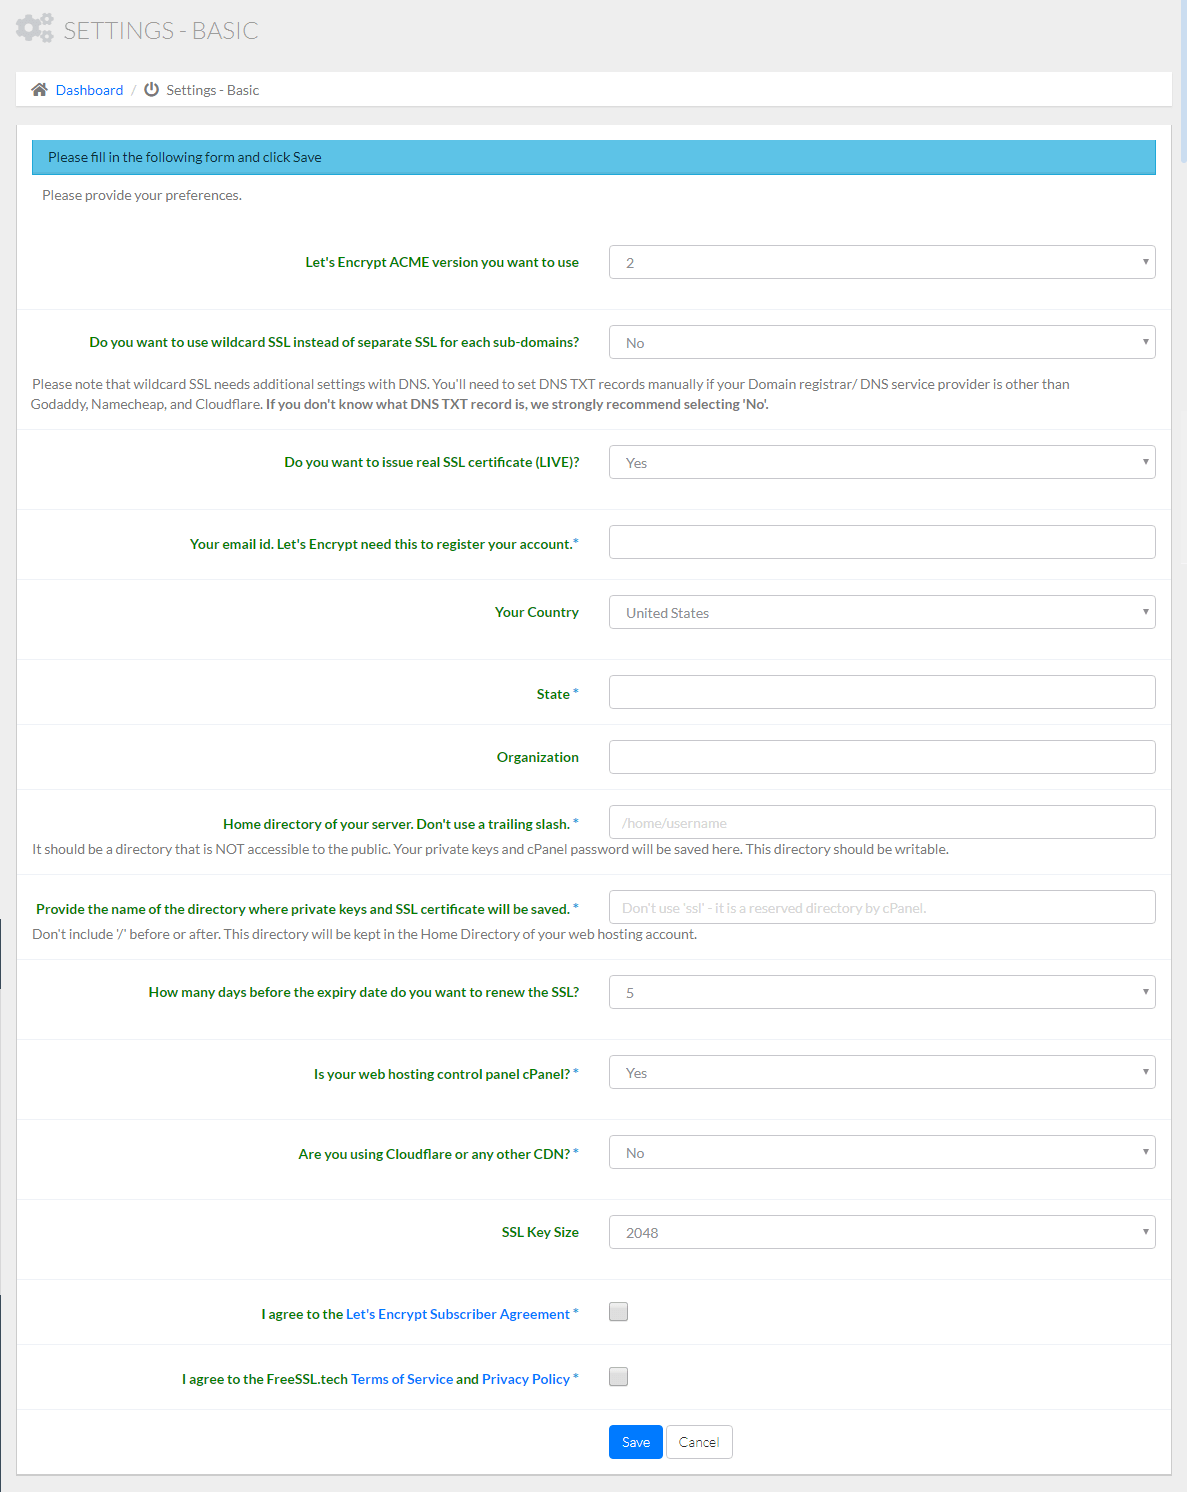
The only thing I think could be more clear on the documentation has to do with the field “Home directory of your server. Don’t use a trailing slash.” (see image below) on the configuration page, where you must set a directory to store your settings.
- Make sure you set the full path. If your hosting account name is
user123then the full path is/home/user123. From here just choose a directory that’s not publicly accessible. - FreeSSL will create the following structure in the chosen folder:
ssl/settings/settings.json. In my case the directories and file were not created and I did so manually (most likely due to permissions).

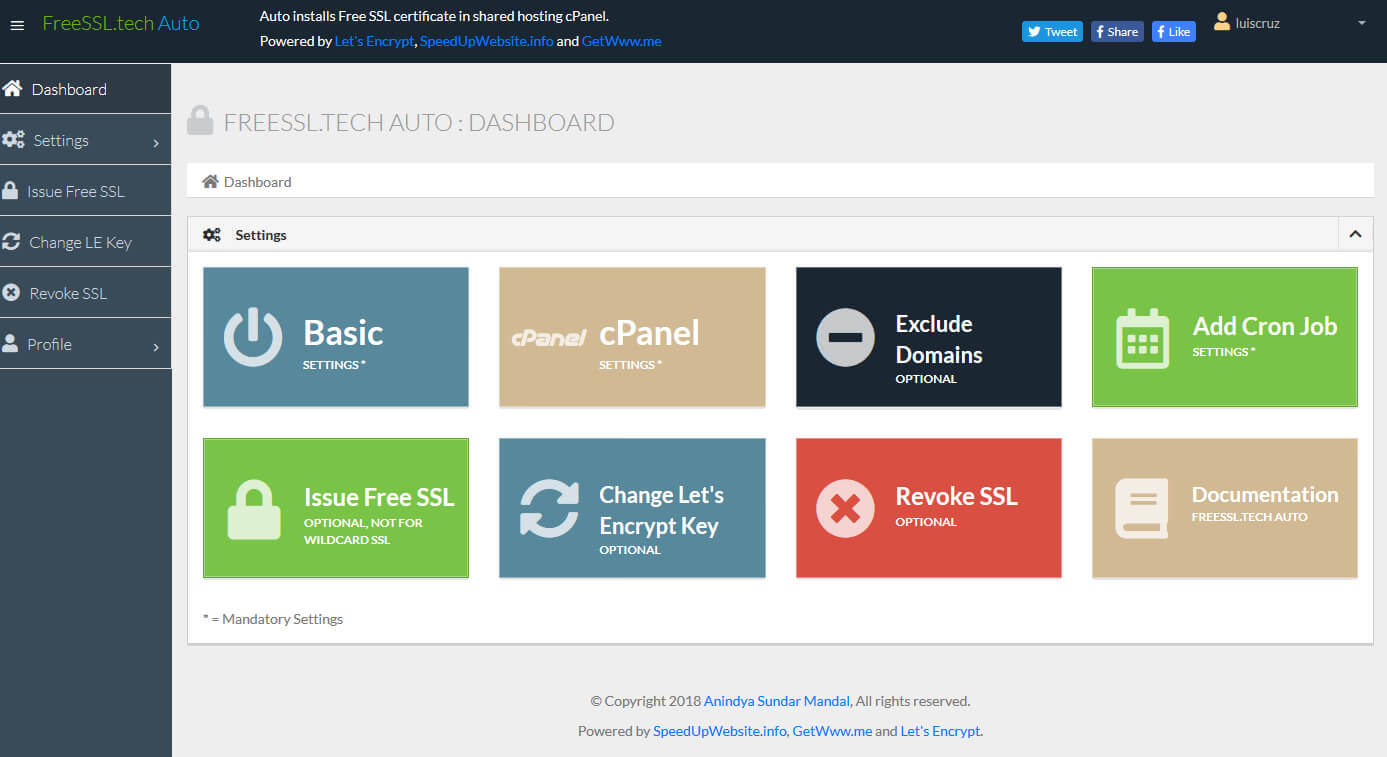
Once this is done, set up your cPanel settings and click on the “Add Cron Job” button so it creates a cron job to monitor the SSLs once per day. If you want to issue SSL certificates right away just click on “Issue Free SSL”.
Optionally, you can exclude one or more domains from FreeSSL filters so they are ignored.