Following the previous article where you’ve installed TeamCity, you can now say that you have a Continuous Integration Server. But it doesn’t do much without an Agent or a Build Configuration.
What is this? A Build Configuration is a list of steps that will be executed. Think about merging all less files and compact all the files into a single minified .css file. Another step from the same configuration could be uglify Javascript files (or, following the same logic of the first step, parse CoffeeScript into Javascript).
The Agent is responsible for the Build Configuration’s execution and you should install at least one Agent so you can work with TeamCity. You can install more than one Agent in the same machine but it can be useful to install the Agents in different machines. A common example is an Agent installed in a Linux machine and another in a Windows machine. This way you can make sure your web application works in Firefox with both operating systems. Or you can make sure that your application works in Internet Explorer even if you use Linux.
Let’s get started. In my case I’ll install the Agent using the same server I’ve used in the previous articles (Linux Mint) but, as I’ve said, you can install the agent in any machine.
Install TeamCity Agent
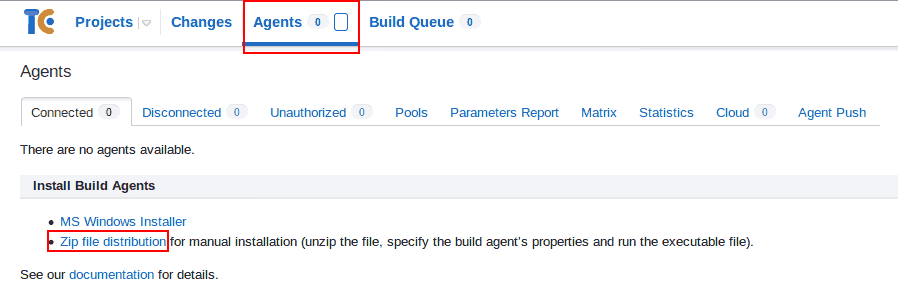
Start by going to TeamCity » Agents (0) and click on Zip file distribution to download the Agent.
Extract the file and move the directory to the location where you want TeamCity Agent. I’ll move it to
/opt/cd ~/Downloads mkdir TeamcityAgent unzip buildAgent.zip –d TeamcityAgent sudo mv TeamcityAgent/ /opt/Create a new configuration file based on the distributed one:
cp /opt/TeamcityAgent/conf/buildAgent.dist.properties /opt/TeamcityAgent/conf/buildAgent.propertiesMake the necessary adjustments to your configuration file. I’ll leave it as it is since I want to install TeamCity Agent on the same machine as TeamCity and I haven’t changed the default URL (which is http://localhost:8111). Anyhow, take a look at the available configurations to know what is available.
Set execution permissions to the script that starts the Agent
chmod +x /opt/TeamcityAgent/bin/agent.shStart the Agent
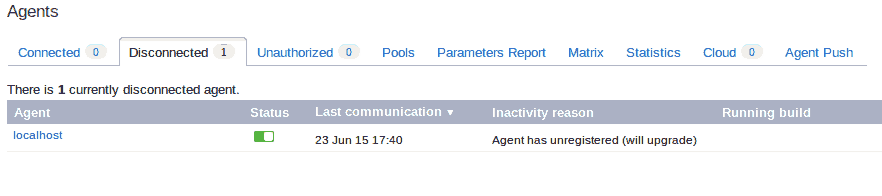
sudo /opt/TeamcityAgent/bin/agent.sh startGo back to TeamCity’s page in your browser and you should see you one agent in the Disconnected tab
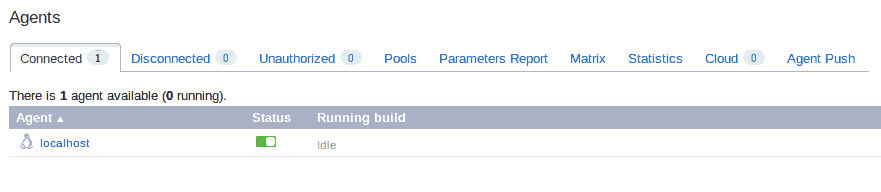
Give it some time so both applications can connect and you should see it in the Connected tab
Create Project and Build Configuration
The installation is completed but we still have to create a Build Configuration. You will need to adjust the Build Configuration to match your needs, since a configuration is strongly affected by the project and the used technology and programming languages. Since I already have a Laravel 5 project created in the second article I’ll use that project.
Our Build Configuration will be quite simple: Laravel 5 was released with a new feature called Elixir that is built on top of Gulp. Everytime you install Laravel, Bootstrap’s .less files are included as is a Gulp task to convert them into a single .css file. We’ll create a Build Configuration that is triggered on any commit to our Git repository and it will have two steps: the first is the gulp task, to update the css file; in the second step we’ll update the PHP dependencies using Composer.
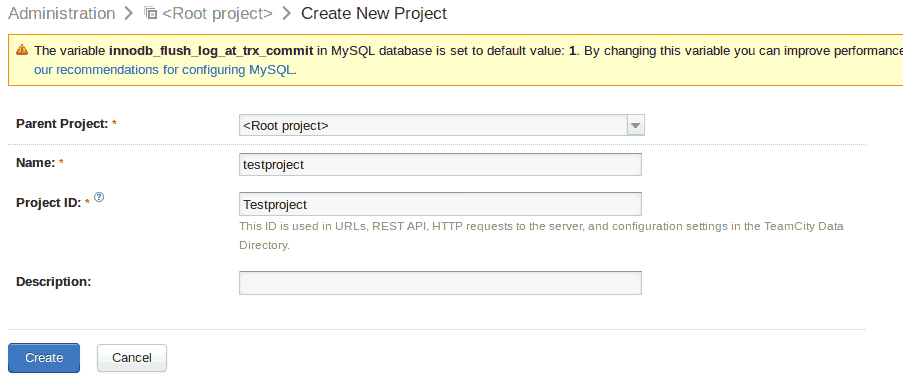
In order to create a Build Configuration go to TeamCity and create a new project through the Projects tab. Then click the Create project button
Fill the name of your project and the description (if you want to) and then click the Create button
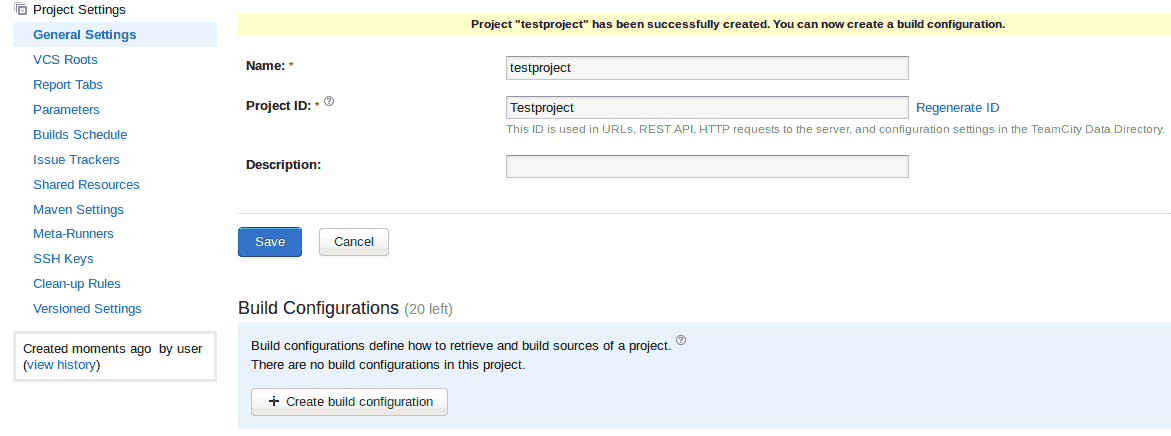
At this moment you’re redirected to the project’s page. In the General settings tab you’ll see the existing Build Configurations below the project’s details. Click on Create build configuration
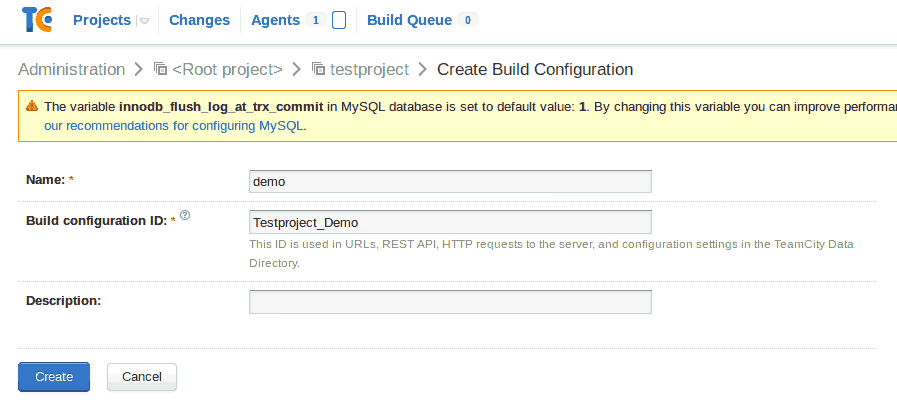
Fill the name and the description for the Configuration.
Now you should point to the repository where you have your app’s code. Properly configure the type and URL of the repository and the authentication method.
I’ll use Git (we’ve installed it on the second article) and will just set the Fetch URL because our CI will never push changes to the repository. For the authentication I’ll use the same SSH keys I’ve created also on the second article.
Remember to set a name and a description for this VCS root.
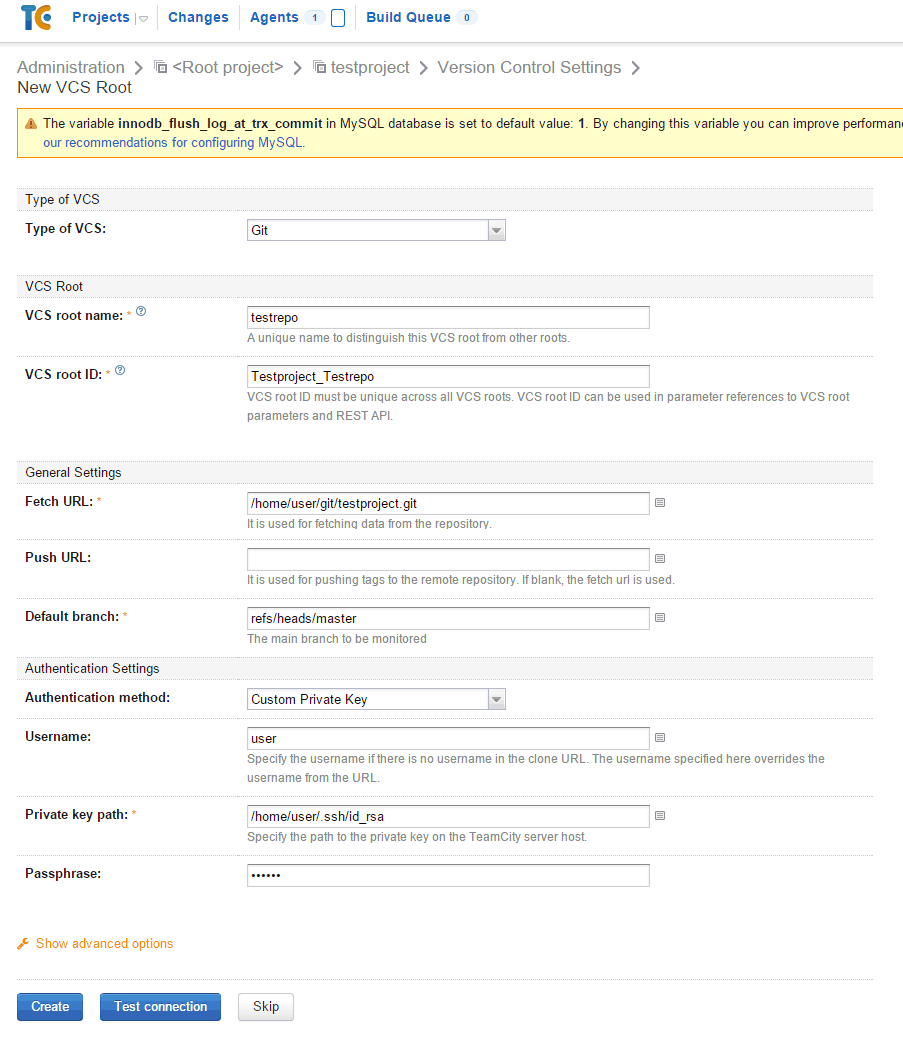
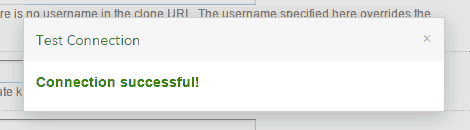
Click the Test connection button to make sure your definitions are correct.
Now TeamCity will try to figure out a few steps in an automated fashion. We’ll use the manually configuration so just click configure build steps manually.
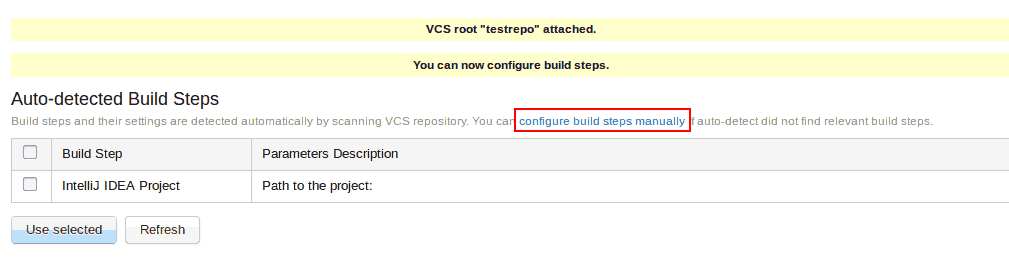
As I said before, our Build Configuration will have two steps. The execution of the Gulp task and the execution of Composer. It’s important to understand that when the Agent is executing the Build Configuration, it’ll pull the application code to /opt/TeamcityAgent/work/{hash}, where {hash} is a unique identifier for the project and will execute the steps using that directory.
In order to execute the steps successfully, you need to have the necessary tools installed on the machine your Agent is running.
Create the first step by selecting Command line in Runner Type and fill a name at your choice. In Run pick the Custom script option and add the following command to the textarea
sudo gulp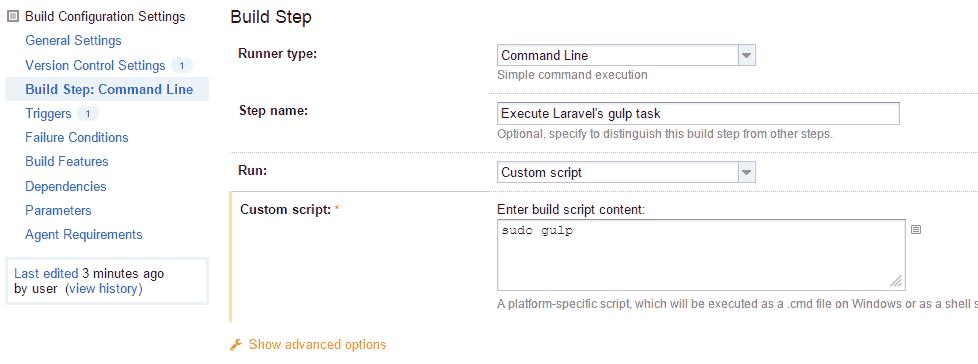
Remember, the machine where the Agent is executed needs to have npm and nodejs and all the necessary dependencies to execute the Gulp task. To install them use the following commands:
sudo apt-get install nodejs-legacy
sudo apt-get install npm
sudo npm install gulp laravel-elixir --global
In this article’s series I’m using Linux Mint based on Debian. If you use the same environment, for some weird reason, you need to user a legacy nodejs version (more info on this StackOverflow post).
Create the second step, to update PHP dependencies through Composer. Got to Build Configuration Settings » Build Step and click the Add build step button.
In Runner type set Command Line and give it a name. Leave Run as Custom Script and add the following script
sudo composer update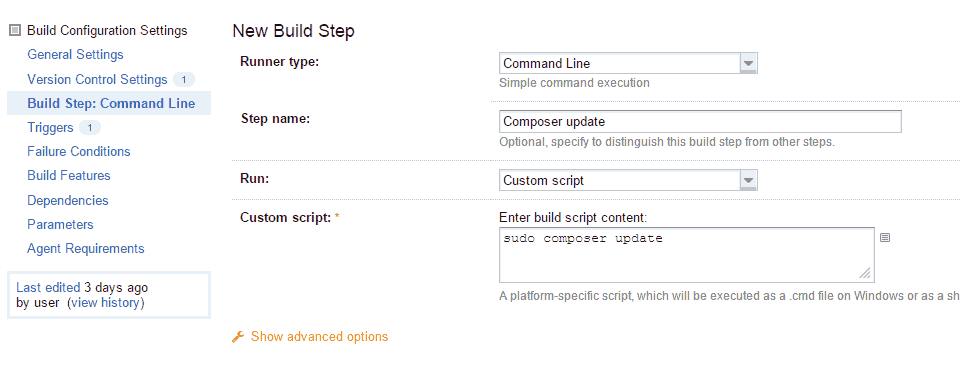
You need to have Composer installed in the machine where the build is executed. If you don’t have it installed, you can use the following commands to do so.
Install CURL with the following command
sudo apt-get install curlInstall Composer via curl:
cd ~/Downloads
curl -sS https://getcomposer.org/installer | php
sudo mv composer.phar /usr/local/bin/composer
In order to perform a
composer updateon a Laravel 5 project, you need to have the PHPmcryptextension. In case you don’t have it installed, use the following command:sudo apt-get install mcrypt php5-mcrypt sudo php5enmod mcrypt
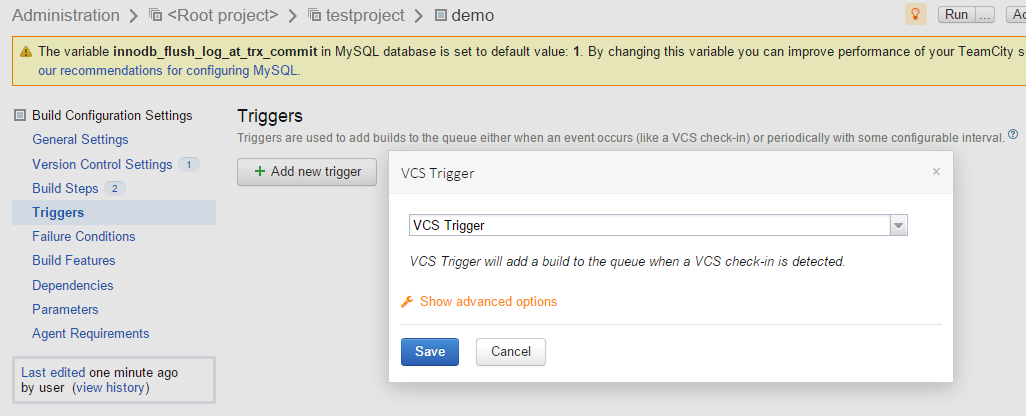
Now we need to specify the triggers for the current Configuration. We will specify that this Configuration is executed each time Git has a new commit.
To do so go to Triggers at the page where you are now. When you’re redirected, click the Add new trigger button and select VCS Trigger
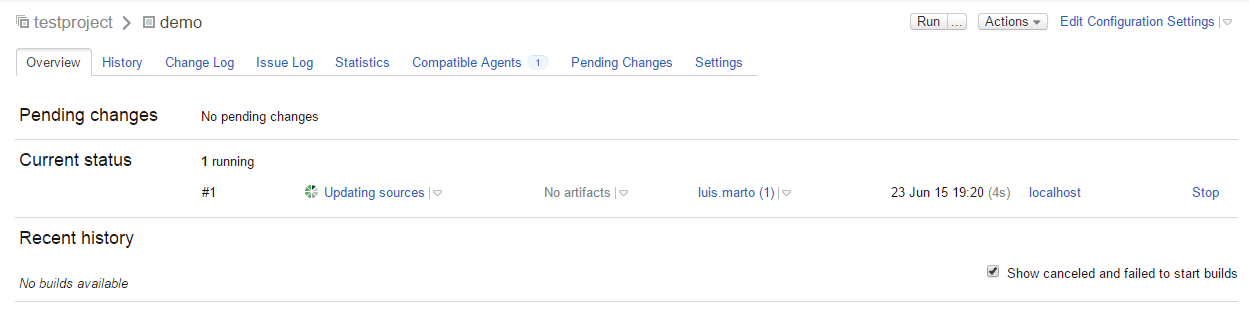
The configuration is now finished. To test it you should commit and push something to the repository. After your push (and a couple of seconds), you’ll see TeamCity triggering the Build Configuration. To watch it in real time access your project’s page:
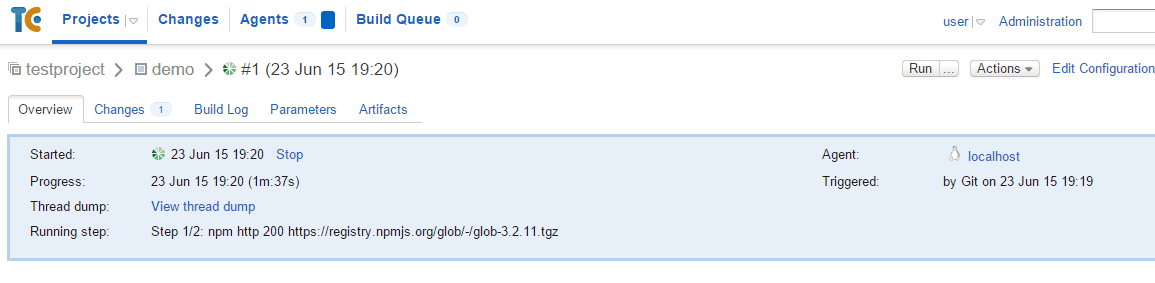
If you click the update sources link (or the name of the currently executed step), you’ll see the build execution details:
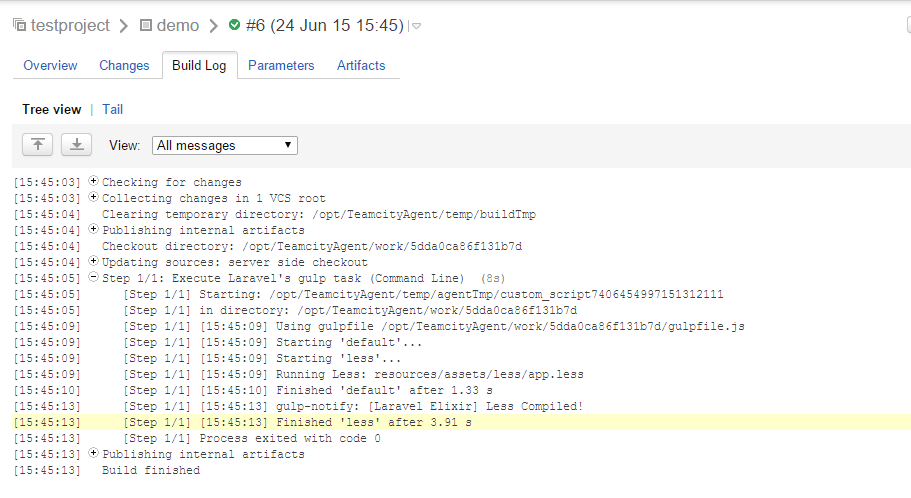
On that page you’ll see the build’s history if you click the Build Log tab and you should see the steps being executed. As you can imagine what you’re seeing is the terminal where the commands are executed.
Even though it’s a very simple configuration, you have automated your development process. You should now try to expand and iterate the build configuration to automate as much as you can. As a suggestion you can add steps to: execute migrations; update Bower dependencies; execute unit tests with PHPUnit; execute integration and acceptance tests with Codeception or Behat and use Selenium.
In the following article I’ll show you how to install and configure SonarQube. At the same time we’ll install PHPunit and add the unit test’s execution and SonarQube analysis to our build configuration.
This article is a part of the series How to set up a Continuous Integration Server for PHP projects
- Tools for a Continuous Integration (CI) server for PHP projects
- Install SSH and Git on Linux and configure a Windows development machine
- Install Redmine and integrate it with Git
- Install and configure TeamCity 9
- Install and configure TeamCity Agent on Linux Mint - You are here
- Install SonarQube and SonarQube Runner on Linux Mint
- Analyse a Laravel 5 (PHP) project with SonarQube
- Integrate SonarQube with TeamCity and Redmine