In the previous article we’ve installed SonarQube and SonarQube Runner. Now that we have the tools, let’s analyse the Laravel 5 project that we’ve created in the second article of “How to set up a Continuous Integration Server for PHP projects”.
This series or articles begun with the article Tools for a Continuous Integration (CI) server for PHP projects and teaches you how to create a continuous integration server from the scratch.
This article is split into the following sections:
- Install PHPUnit and configure
phpunit.xml - Add
sonar-project.propertiesto your PHP project - Execute the project analysis with SonarQube Runner
1. Install PHPUnit and configure phpunit.xml
SonarQube needs to know the amount of code coverage and to generate that data, I’ll use PHPUnit. PHPUnit is included in Laravel, but we still need to install the script on our server and change the configuration file for phpunit.xml. To do so, follow the next steps.
Start with PHPUnit installation in your server:
cd ~/Downloads
wget https://phar.phpunit.de/phpunit.phar
chmod +x phpunit.phar
sudo mv phpunit.phar /usr/local/bin/phpunit
In order for PHPUnit to export and save the results of each test execution you need to have XDebug extension installed in your PHP. If you don’t have the extension installed you can do so with the command
sudo apt-get install php5-xdebugAll the commands in this article were executed on a Linux Mint based on Ubunto. If you're using another Linus dist it's likely that you just need to change the dependency manager (apt-get) but it's also possible that the dependency names are different. If so, you'll need to figure the correct dependencies.Now that you have installed PHPUnit, we will update the
phpunit.xmlconfiguration file according to what we need. This file is located under the project’s root and we’ll set the following content:<?xml version="1.0" encoding="UTF-8"?> <phpunit backupGlobals="false" backupStaticAttributes="false" bootstrap="bootstrap/autoload.php" colors="true" convertErrorsToExceptions="true" convertNoticesToExceptions="true" convertWarningsToExceptions="true" processIsolation="false" stopOnFailure="false" syntaxCheck="false"> <testsuites> <testsuite name="Application Test Suite"> <directory>./tests/</directory> </testsuite> </testsuites> <php> <env name="APP_ENV" value="testing"/> <env name="CACHE_DRIVER" value="array"/> <env name="SESSION_DRIVER" value="array"/> <ini name="memory_limit" value="2048M"/> </php> <logging> <log type="coverage-html" target="./ci/codeCoverage/" charset="UTF-8" yui="true" highlight="false" lowUpperBound="35" highLowerBound="70"/> <log type="coverage-clover" target="./ci/codeCoverage/codeCoverage.xml"/> <log type="metrics-xml" target="./ci/codeCoverage/metrics.xml"/> <log type="test-xml" target="./ci/codeCoverage/logfile.xml" logIncompleteSkipped="false"/> </logging> </phpunit>The differences from our changes to the original file are:
- In the group
<php>I’ve included the property<ini name="memory_limit" value="2048M"/>to allow a larger memory limit when PHPUnit is running the tests. Although this property isn’t required, I recommend you add it to your configuration file. I’ve added the group
<logging>which is what really matters. This configuration tells PHPUnit that it should save the test results, which will be then read by SonarQube.Whenever you run PHPUnit, it will save the test result in
«project_root»/ci/codeCoverage.
- In the group
Execute
phpunitcommand in the root of your project to assure that you have everything properly configured. Once the process ends, you should see test results created within the previous directory: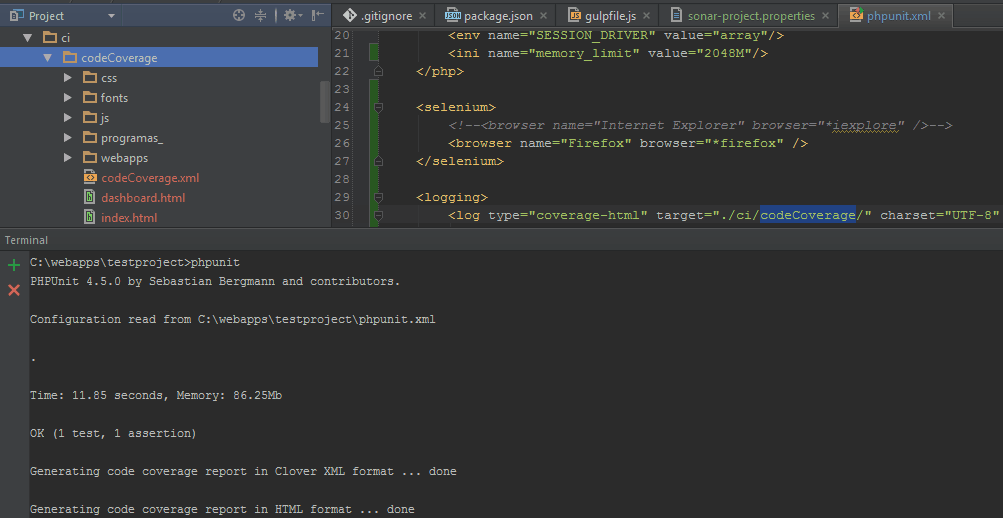
Now
pushyour project’s changes to the repository.Before pushing the changed files, add thecidirectory to the.gitignorefile. The resulting files of phpunit are only useful for SonarQube and there's no reason to add them to your repository.Once you’ve pushed the configuration file to the repository, assuming you’ve being following this series of articles, a new TeamCity build will be triggered. If you access TeamCity, you should see something like the following:
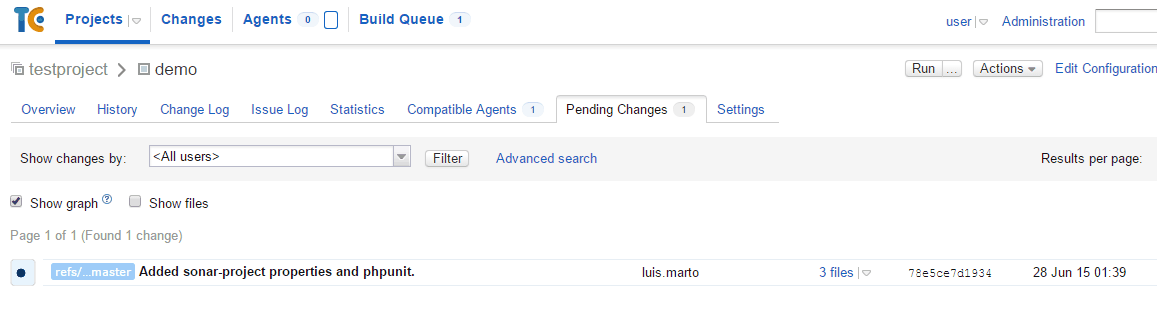
Wait for it to finish and then move onto the next step.
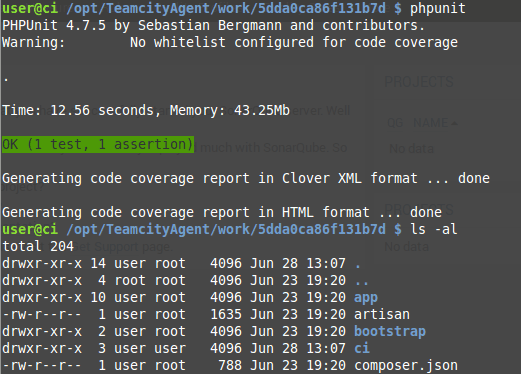
Finally, let’s check the tests are properly executed within the server and the test results are saved in
cidirectory. To test it, access your server’s terminal and go to the directory that contains the application code (the TeamCity Agent directory), by using the following command. Remember to replace {hash} by the correct directory’s name.cd /opt/TeamcityAgent/work/{hash} phpunitYou should see the following information if everything was properly configured:
2. Add sonar-project.properties to your PHP project
The project isn’t yet visible to SonarQube because we haven’t done an analysis. To do so you need to create a file called sonar-project.properties in your project’s root, with the following content::
# Required metadata
sonar.projectKey=testproject
sonar.projectName=testproject
sonar.projectVersion=1.0.0

# Path to the parent source code directory.
sonar.sources=app

# Language
# We've commented this out, because we want to analyse both PHP and Javascript
#sonar.language=php

# Encoding of the source code
sonar.sourceEncoding=UTF-8

# Reusing PHPUnit reports
sonar.php.coverage.reportPath=ci/codeCoverage/codeCoverage.xml
sonar.php.tests.reportPath=ci/testResults.xml

# Here, you can exclude all the directories that you don't want to analyse.
# As an example, I'm excluding the Providers directory
sonar.exclusions=app/Providers/**

# Additional parameters
#sonar.my.property=value
This is the configuration file of your project, to be interpreted by SonarQube. Here’s a description of each property.
sonar.projectKey,sonar.projectNameesonar.projectVersion: this are mandatory values used by SonarQube to identify the project.sonar.sources: Indicates the directory which contains your application’s code. We pointed it toapp’s directory because that’s where our code is.You shouldn’t include directories such as
vendor,node_componentsorbower_componentssince the code in this directories is already tested and you don’t maintain that code. Analysing such directories can cause misleading results list giving you a higher test coverage and is a waste of time. You should only add your application’s code.sonar.language: Indicates the programming language that should be analysed. We’ve commented this property (with #) because we want to analyse multiple languages (PHP e Javascript). We’ll get that later on.sonar.php.coverage.reportPathandsonar.php.tests.reportPath: Paths to PHPUnit’s test results. Set the same paths as you did earlier in thephpunit.xmlconfiguration files.sonar.exclusions: Allows you to exclude files or directories withinsonar.sources. Strictly for demonstration purposes, I’ve specified theProvidersdirectory. In a real application you should remove this property or specify directories that you want to exclude from the analysis.As a side not, this property is specially useful if you work with Laravel 4 because the
appdirectory contained files related todatabase,langs,storageand (views), all of them irrelevant to the purpose intended by SonarQube.sonar.my.property: This property is commented ou and serves only to demonstrate that you can set specific properties per project that can later be used in SonarQube.
There are more properties that you can include and there are some properties specific to your project’s technology. Check this GitHub link to view other possible configurations per programming languages. To do so, follow the steps:
- Select your intended programming language
- Look for a directory ending with sonar-runner
- Check the contents of the
sonar-project.propertiesfile
Once you add the file to your projecto, push the changes to the Git repository.
3. Execute the project analysis with SonarQube Runner
It’s now time to perform a SonarQube analysis. To do so execute the following commands within your server’s terminal.
cd /opt/TeamcityAgent/work/{hash}
sudo /opt/sonar-runner-2.4/bin/sonar-runner -e -X
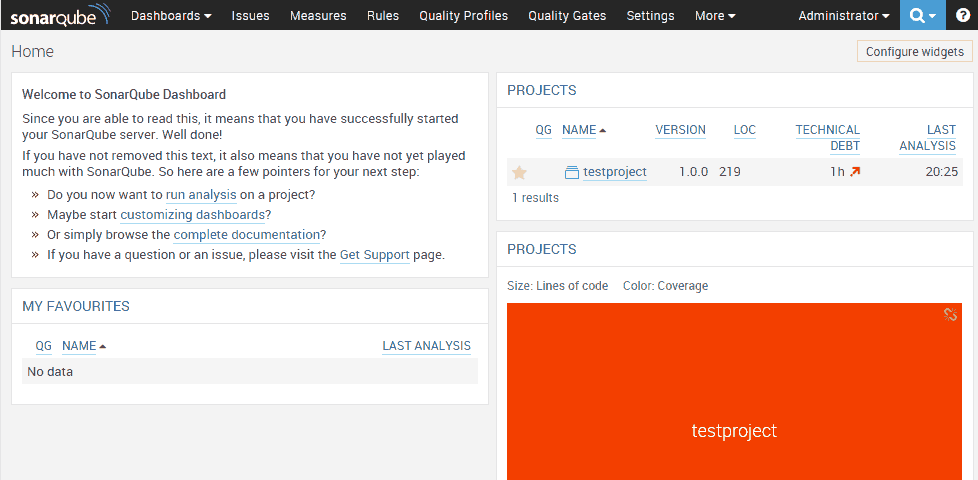
The command should finish with the information EXECUTION SUCCESS. If you access SonarQube’s application, you should see your project:
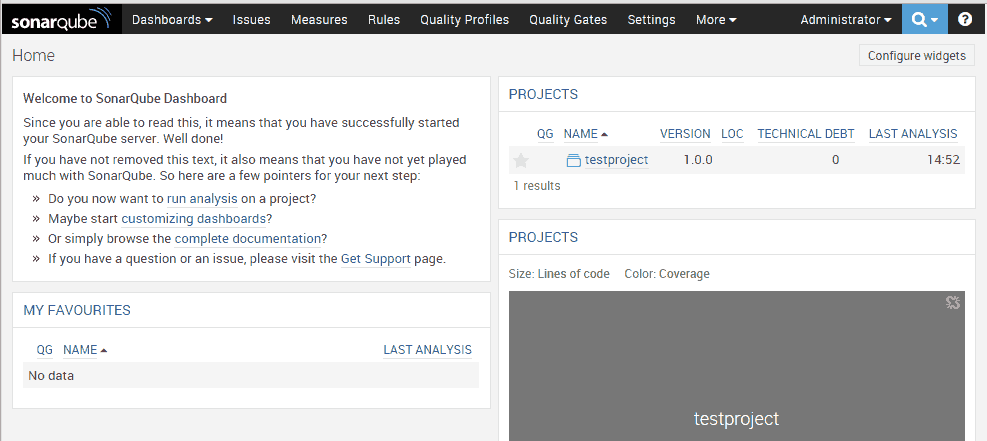
Click on the project’s name and you’ll be redirected to a page with the project’s details. However, you’ll see the displayed information isn’t real yet.
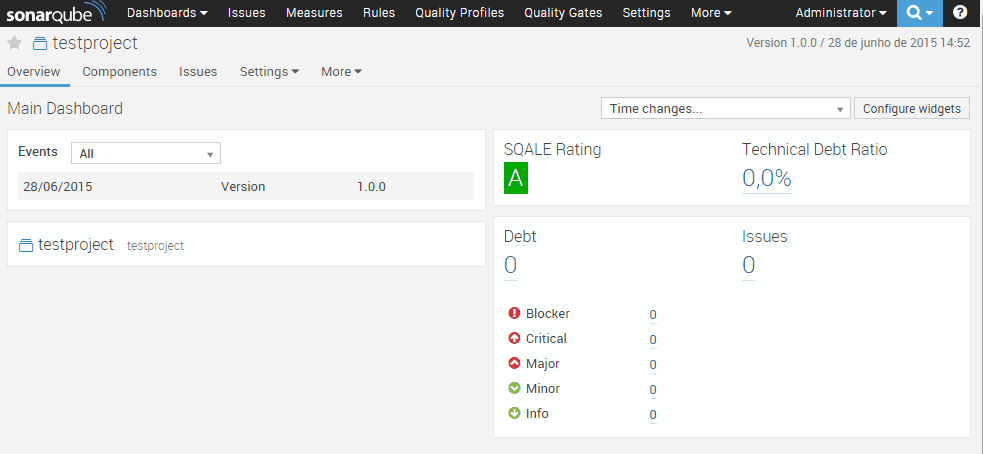
The reason for this is the language used by SonarQube Runner when the analysis was made. Remember that we’ve commented the sonar.language property earlier so SonarQube thinks we have a Java project.
To fix this, we need to specify what programming languages we want to analyse, so you’ll need to go to Settings » System » Update Center as the image below.
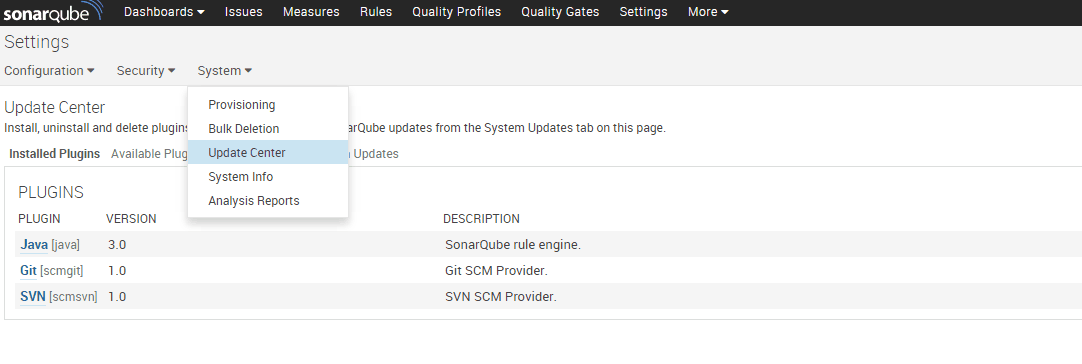
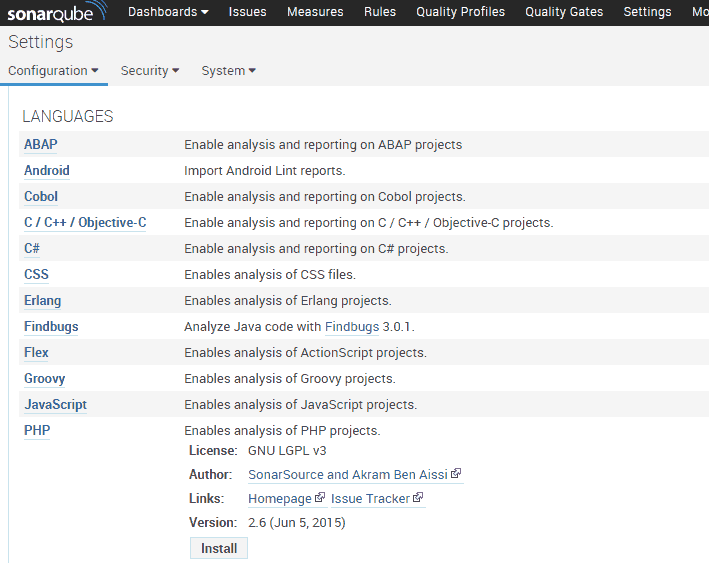
Here you can install custom plugins and we will install: PHP, Javascript (both belong to Languages’s group) and Redmine (within Integration group). To instal a plugin, click on the plugin’s name and click the Install button.
Once you have the plugins installed, restart SonarQube with the following command
/opt/sonarqube-5.1.1/bin/linux-x86-64/sonar.sh restart
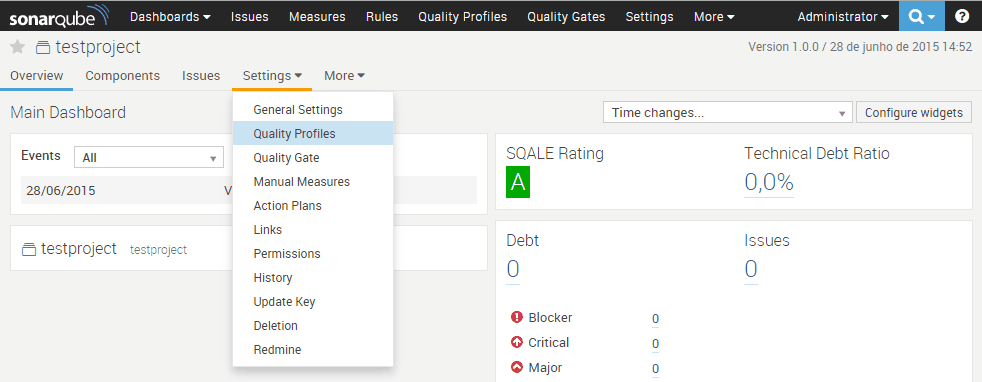
Before we perform another analysis, we need to define the Quality Profiles because SonarQube’s analysis depends on it. These profiles can be pre-configured (like PSR-2) or can be defined by you. To manage the quality profiles go to the Quality Profiles menu.

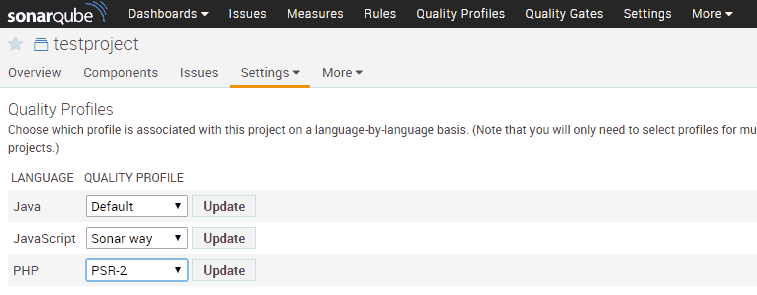
Now we need to define the quality profiles we want for our project. Go to Dashboard and access you project. Now go to Settings » Quality Profiles and set the Sonar way profile for Javascript and PSR-2 for PHP.
Let’s analyse the project again :
cd /opt/TeamcityAgent/work/{hash}
sudo /opt/sonar-runner-2.4/bin/sonar-runner -e -X
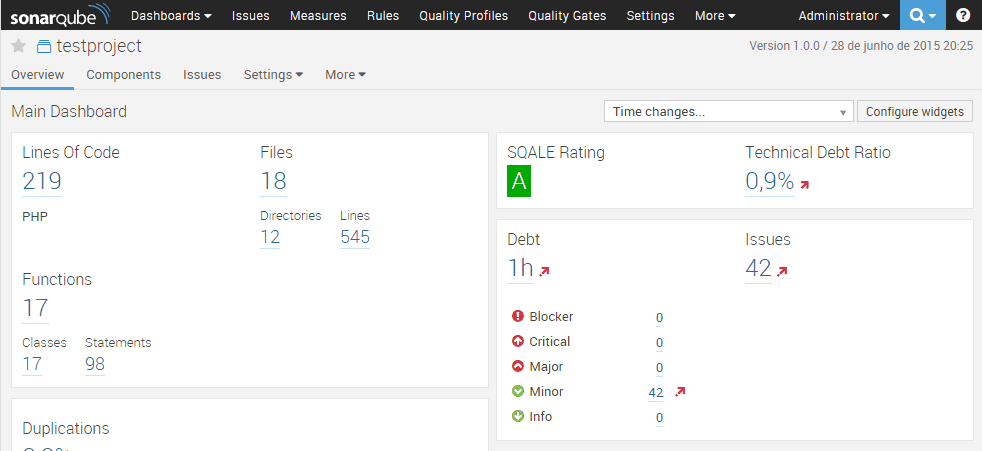
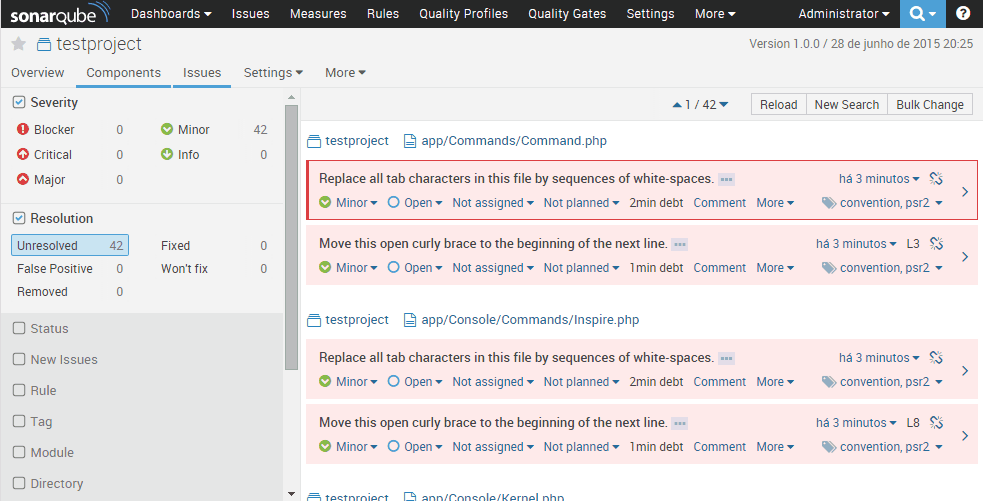
After this you should see the Lines of Code, the total number of issues and the details for each issue. You can take a lot of information from the analysis and there’s various ways to view that information. But, my part is done, and I’ll leave you to it : )

With this information I hope you can analyse you project. I advice you to perform an analysis on a regular basis to keep the Technical debt under control. In the next article I’ll show you how to integrate SonarQube with TeamCity and SonarQube with Redmine.
I hope you’ve enjoyed the article and let me know how is your CI server going. Also, use the comments for any issue you may have.
This article is a part of the series How to set up a Continuous Integration Server for PHP projects
- Tools for a Continuous Integration (CI) server for PHP projects
- Install SSH and Git on Linux and configure a Windows development machine
- Install Redmine and integrate it with Git
- Install and configure TeamCity 9
- Install and configure TeamCity Agent on Linux Mint
- Install SonarQube and SonarQube Runner on Linux Mint
- Analyse a Laravel 5 (PHP) project with SonarQube - You are here
- Integrate SonarQube with TeamCity and Redmine