Redmine is a project management software, developed using Ruby On Rails and multiplatform. It’s a flexible application with a growing community.
In this article, which is part of the series “How to setup a Continuous Integration Server for PHP projects”, we’ll show you how to install Redmine 2.6.1 on a Linux Mint 17.1 machine and how to integrate it with Git so you can see Git history within Redmine and how to close issues with commit messages.
Since Redmine is a web application, we’ll need to install Apache and MySQL for the database. We will also setup Redmine to use HTTPS with a self-signed SSL certificate. This article is divided in the following sections:
- Preparation - Install Apache, MySQL and dependencies
- Install Redmine
- Configure SSL
- Complete Redmine installation
- Create project and integrate Redmine with Git
Preparation - Install Apache, MySQL and dependencies
The first step is to install Apache web server and Phusion Passenger.
sudo apt-get install --no-install-recommends apache2 libapache2-mod-passengerRedmine needs a database to store date and you can use MySQL, PostgreSQL or SQL Server. For these article, we’ll use MySQL. If you want another database system, take a look at this section from the documentation.
When you install MySQL it will ask you for the root password. If you’re setting up a server for production choose a complex password.
sudo apt-get install mysql-server mysql-clientNow that we’ve installed MySQL, we will create the user, which I called redmineusr and has the password Redmine@usr, and database for Redmine which I named redminedb.
mysql -u root –p
create database redminedb character set utf8;
create user 'redmineusr'@'localhost' identified by 'Redmine@usr';
GRANT ALL PRIVILEGES ON redminedb.* TO 'redmineusr'@'localhost';
exit
We end up the preparation phase with the installation of Ruby, Rake and additional necessary libraries.
sudo apt-get install --no-install-recommends git rubygems-integration ruby1.9.1-dev ruby-rmagick rake make gcc libmysqlclient-dev bundler
Install Redmine
To this date, the most recent version of Redmine is 2.6.1 and that is what we’ll install.
Note: if you’re installing Redmine and you want to use specific plugins, you need to make sure those plugins are compatible with the version you’re installing. In order to do that go to Redmine’s plugins page and check the compatible versions of each plugin.
cd /var/www
sudo wget https://www.redmine.org/releases/redmine-2.6.1.tar.gz -O redmine-2.6.1.tar.gz
sudo tar xvfz redmine-2.6.1.tar.gz
sudo rm redmine-2.6.1.tar.gz
sudo mv redmine-2.6.1 redmine
cd /var/www/redmine
Next we need to install Bundler, that manages the gem dependencies for Redmine and, finally, we install all the necessary gems.
sudo gem install bundler
bundle install --without development test sqlite rmagick
Create a configuration file for Redmine, set up file permissions and fill the configuration file
touch config/database.yml
chmod 640 config/database.yml
sudo chgrp www-data /var/www/redmine/config/database.yml
chmod ugo+r /var/www/redmine/config/database.yml
gedit config/database.yml
In the open editor, paste the following configuration (edit the database information to match your definitions)
production:
    adapter: mysql2
    database: redminedb
    socket: /var/run/mysqld/mysqld.sock
    username: redmineusr
    password: "Redmine@usr"
    encoding: utf8
After you’ve saved and closed the configuration file, run Bundler again
bundle install --without development test sqlite rmagickNow, create a random token that is used by Rails to encode the transmitted data
rake generate_secret_token
chmod 0640 config/initializers/secret_token.rb
sudo chgrp www-data config/initializers/secret_token.rb
chmod ugo+r /var/www/redmine/config/initializers/secret_token.rb
Execute migrations (scripts) to load the default configuration values
RAILS_ENV=production rake db:migrate
RAILS_ENV=production REDMINE_LANG=en rake redmine:load_default_data
Create folders and set up permissions
mkdir -p tmp tmp/pdf public/plugin_assets
sudo chown -R www-data: files log tmp public/plugin_assets
sudo chmod -R 0755 files log tmp public/plugin_assets
sudo chmod -x log/*.log
Adjust the log definitions so you don’t end up with gigantic log files
sudo gedit /etc/logrotate.d/redmineIn the open editor, add the following configuration and save the file.
/var/www/redmine/log/*.log {
    daily
    missingok
    rotate 7
    compress
    notifempty
    copytruncate
}
In order to test the installation, before we move on to Apache, we will use WEBrick web server through the command
sudo ruby script/rails server webrick -e productionIf all went well you should see the following or a simillar output
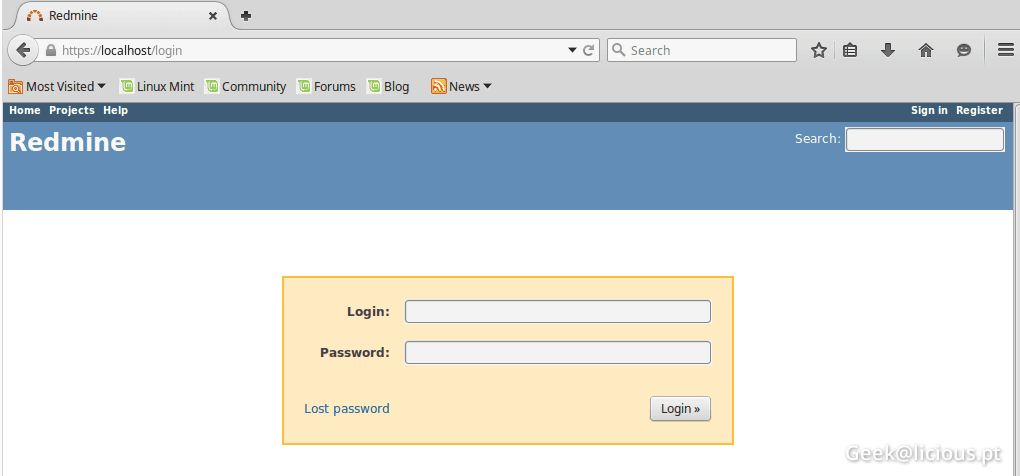
=> Booting WEBrick
=> Rails 3.2.21 application starting in production on http://0.0.0.0:3000
=> Call with -d to detach
=> Ctrl-C to shutdown server
Access the http address (http://0.0.0.0:3000) and you should see Redmine’s homepage. If you want to login, the user is admin and so is the password.

After making sure that all went well, we can end WEBrick process
CTRL+C
cd
In the following steps we will configure Apache and Passenger and configure the virtual host for Redmine. The server name I’m using is ciserver and you should change it in case you’re using a different name (in lowercase).
sudo gedit /etc/apache2/sites-available/ciserver-ssl.confOn the editor, paste the following configuration
PassengerMaxPoolSize 2
PassengerMaxRequests 1000
PassengerUploadBufferDir /tmp/
PassengerHighPerformance on
PassengerUser www-data
ServerTokens Prod
ServerSignature Off
<VirtualHost _default_:443>
    ServerName ciserver
    SSLEngine On
    SSLCertificateFile    /etc/apache2/ssl/ciserver.crt
    SSLCertificateKeyFile /etc/apache2/ssl/ciserver.key
    <FilesMatch ".(cgi|shtml|phtml|php)$">
        SSLOptions +StdEnvVars
    </FilesMatch>
    <Directory /usr/lib/cgi-bin>
        SSLOptions +StdEnvVars
    </Directory>
    DocumentRoot /var/www/redmine/public
    <Directory /var/www/redmine/public>
        Options FollowSymLinks
        AllowOverride None
        Require all granted
    </Directory>
</VirtualHost>
Let’s add the virtual host (vhost) to Apache
sudo a2dissite default 000-default
a2dissite default-ssl
sudo service apache2 restart
sudo a2ensite ciserver-ssl
sudo service apache2 reload
Note: when you run these commands there may be some errors due to the lack of SSLEngine or missing files such as ciserver.crt and ciserver.key. Ignore this, since we’ll create the certificate in the next steps.
It’s a good thing to set the server name in the Apache global configuration. To do that, run the command
sudo gedit /etc/apache2/apache2.confand add, in case it doesn’t exist, the directive ServerName with your server name. In my case I added this
ServerName ciserver
Configure SSL
So, when we configured the virtual host we pointed the configuration to the files ciserver.crt and ciserver.key that we’ll create now. At this step we will generate a self-signed SSL certificate. If you want a certificate signed by an authorized company, take a look at our How to create a free SSL certificate and import it to cPanel guide.
First, let’s create a new directory /etc/apache2/ssl, which will store the certificate files. While we’re at it, lets install SSL engine and set up a temporary certificate
sudo mkdir /etc/apache2/ssl
sudo /usr/sbin/make-ssl-cert /usr/share/ssl-cert/ssleay.cnf /etc/apache2/ssl/ciserver.crt
cd /etc/apache2/ssl
sudo cp ciserver.crt ciserver.key
sudo chmod 600 /etc/apache2/ssl/ciserver.key
a2enmod ssl
sudo apache2ctl -S
sudo service apache2 restart
If all went well, at this time you will be able to access Redmine through HTTPS. Since the certificate is temporary, you’ll get a notice that the site isn’t safe.
Now let’s create a valid self-signed certificate. Start by generating the private key
cd /etc/apache2/ssl
sudo openssl genrsa -des3 -out ciserver.key 1024
Now generate the CSR (Certificate Signing Request)
sudo openssl req -new -key ciserver.key -out ciserver.csrRemove the pass phrase from the key
sudo cp ciserver.key ciserver.key.org
sudo openssl rsa -in ciserver.key.org -out ciserver.key
And create the certificate
sudo openssl x509 -req -days 365 -in ciserver.csr -signkey ciserver.key -out ciserver.crt
sudo cp ciserver.crt ciserver.key /etc/apache2/ssl
Finally restart Apache
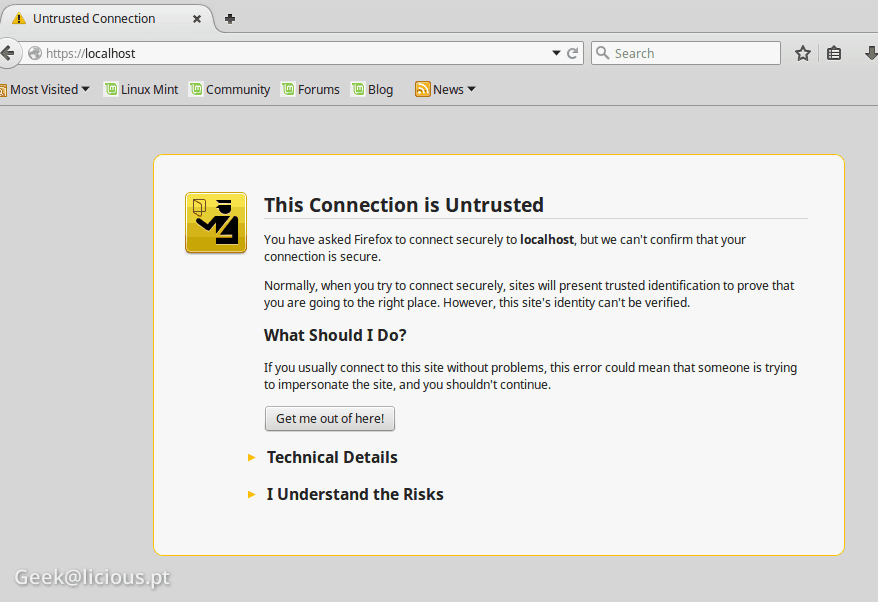
sudo service apache2 restartIf Apache was successfully started, the certificate was created and is being used by Apache. However, browser will still show an insecure HTTPS connection. To solve this, we need to import our self-signed certificate to our browser.
If you’re using (Linux) follow the steps
- Go to Edit menu » Preferences
- Select the Advanced tab
- Click on View certificates
- Within Authorities tab, click Import…
- Select the file ciserver.crt and import it
- Restart Firefox
To import the certificate on other browsers go tothis StackOverflow post.
After importing the certificate, the insecure connection warning will disappear and you have direct access to Redmine.
Complete Redmine installation
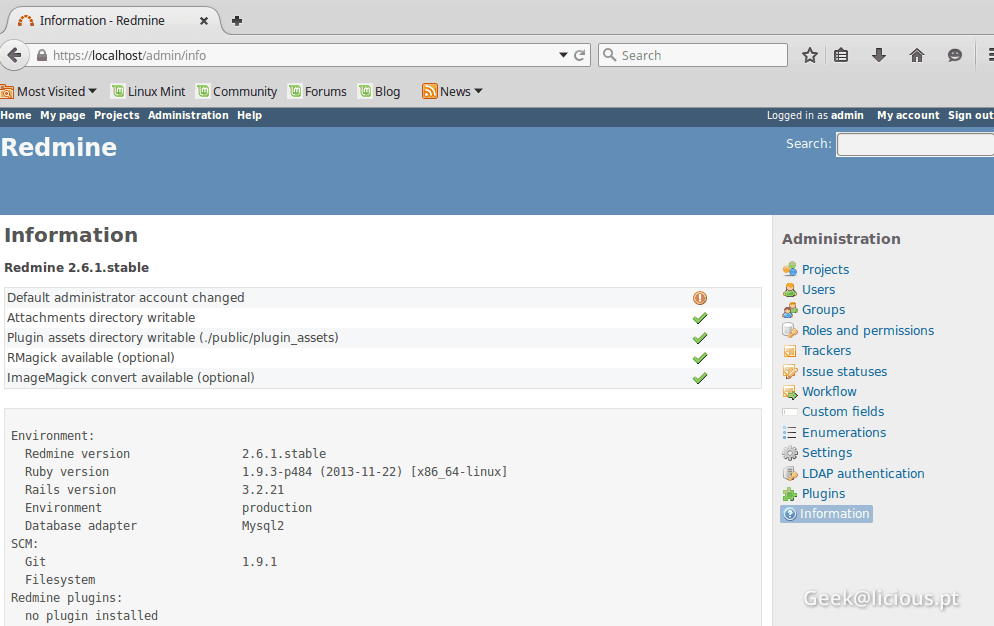
There is one more step that you should take before you can use Redmine. You should install ImageMagick that allows you to create images and is used by multiple plugins
sudo apt-get update
sudo apt-get install imagemagick --fix-missing
Remember to change the admin password and take a look at the plugins page. Some plugins are quite neat like Lightbox Plugin 2, CKEditor, Attach image from clipboard and Advanced Roadmap v2.
And that’s that! Redmine is installed and you are using a secure connection through HTTPS.
Create project and integrate Redmine with Git
In the second article of this series we installed Git and pushed our first commit to the server. Now that we’ve installed Redmine, let’s see how we can integrate both tools and how to close Redmine issues with Git commit messages.
Start by log in into Redmine with an Administrator account. Then go to Projetss
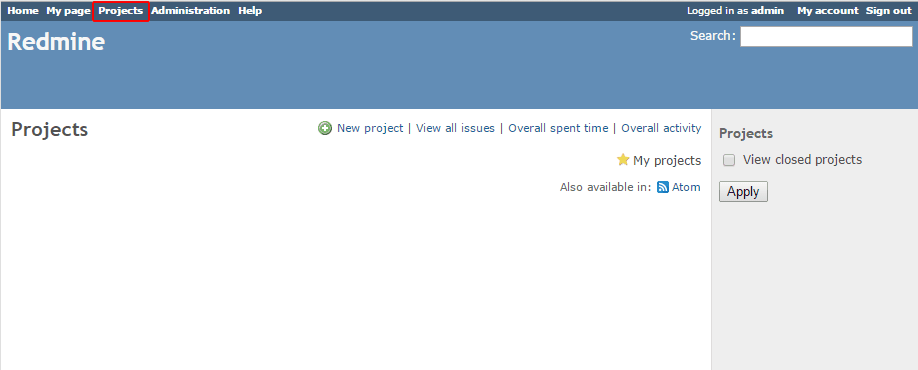
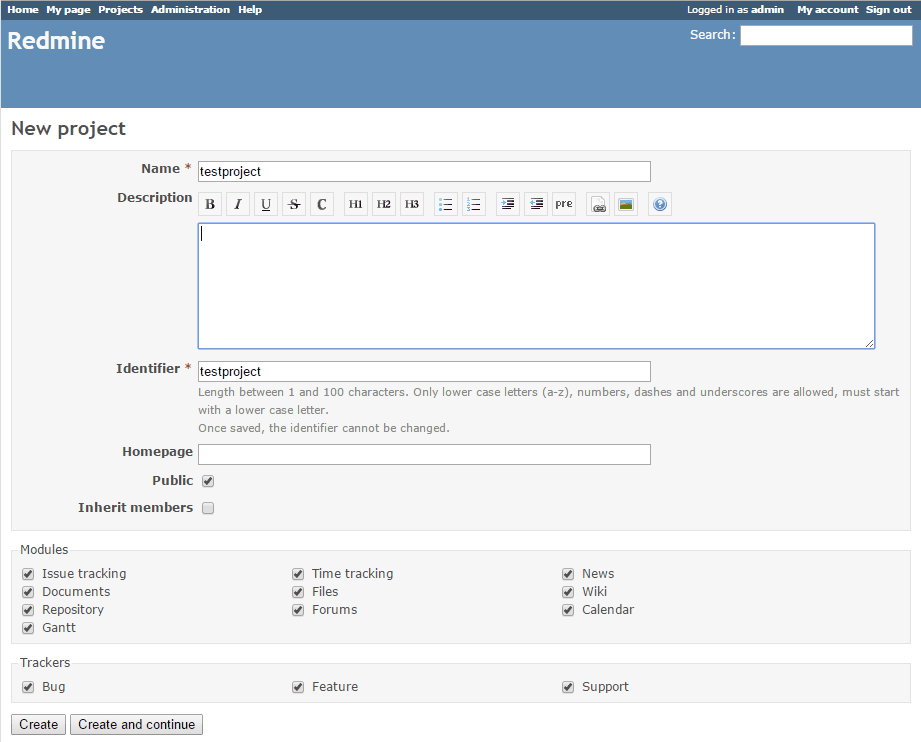
Now click on “New project” and fill the necessary fields. You can change everything but the identifier after the project is created.
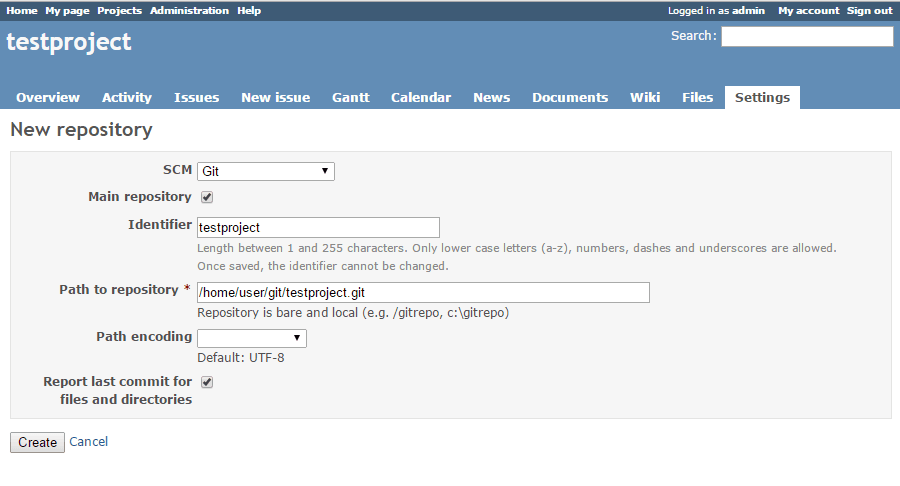
Go to “Repositories” tab and click on “New repository”

Select Git as SCM, enter the repository identifier and enter the full path to your git repository. Since we installed both Redmine and Git on the same server, we just need to enter the real path(/home/user/git/testproject.git) of the directory that we’ve created on the second article of this series.
If you have your Git repository on a different machine from Redmine, you’ll need to share that directory and set the network share path.
When Git was installed we pushed a commit to the server. So, if you go back to “Repositories” tab, you’ll see all the files from that commit.
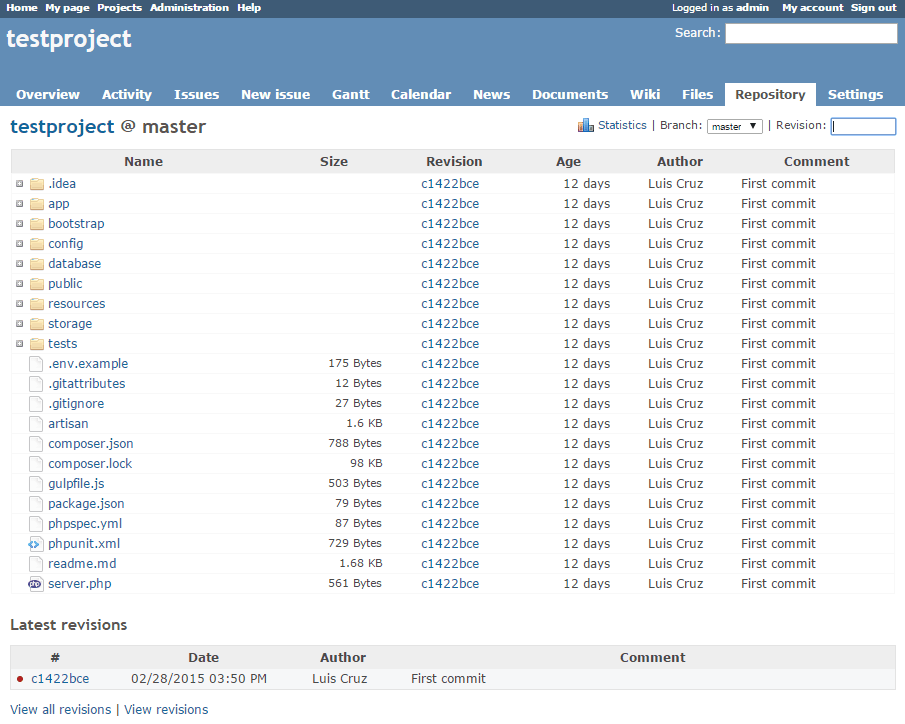
It’s pretty great to see Git history on Redmine isn’t it? For total awesomeness let’s change Redmine settings so our issues and tasks are automatically closed with the messages from Git commits.
Go to Administration » Settings » Repositories tab. At the end of the page you’ll see some sort of table where it’s possible to define new keywords and what those keywords do.
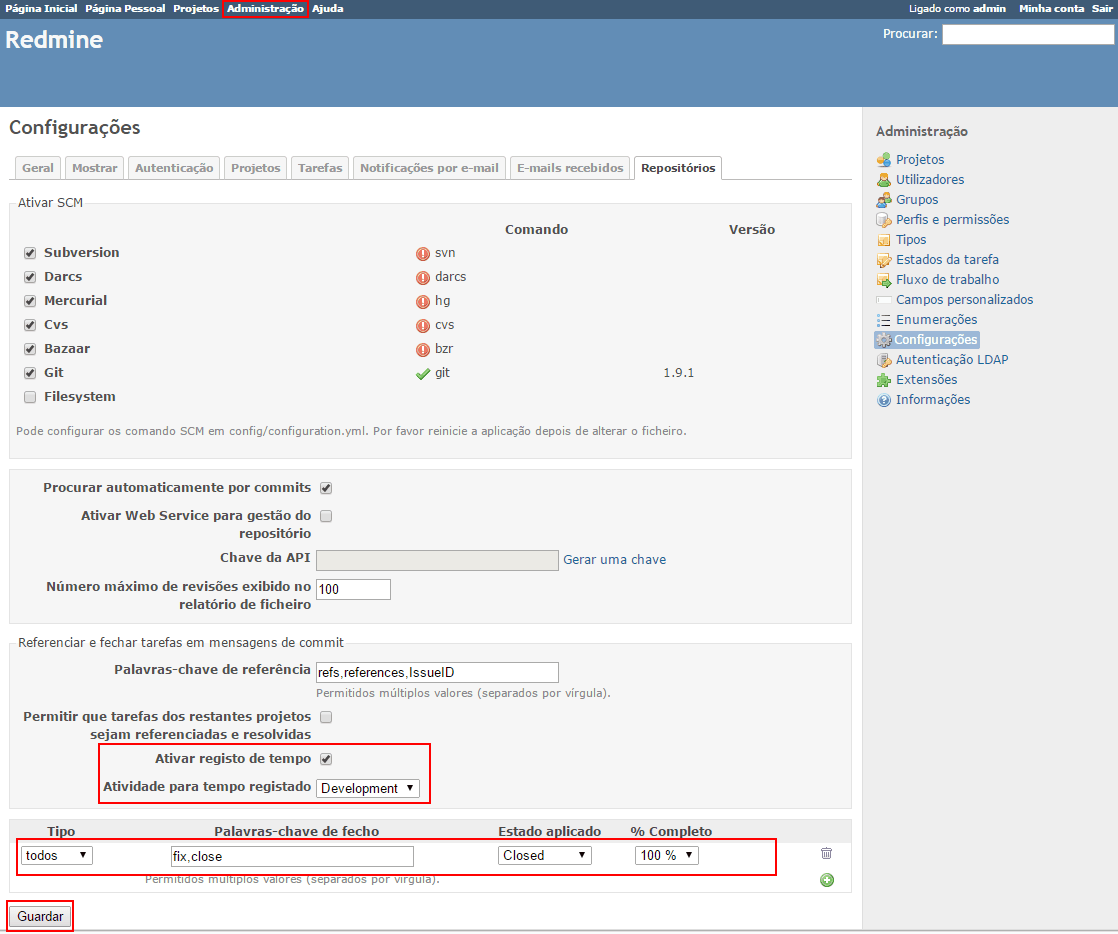
Specifically:
- Tracker: Specify if you want this rule to be applied to all types of tasks or to a specific task. This way you can use the same keywork with different results for each tracker.
- Fixing keywords: Enter the keyword or keywords that should do something.
- Applied status: Should this keyword change the task status? If so, change accordingly.
- % Done: Modify the % done when this keyword is found.
If you want to enable time tracking with commit messages, you need to
- Select the option Enable time logging
- Change Activity for logged time to something other than “Default”.
After you save the settings, create a new task
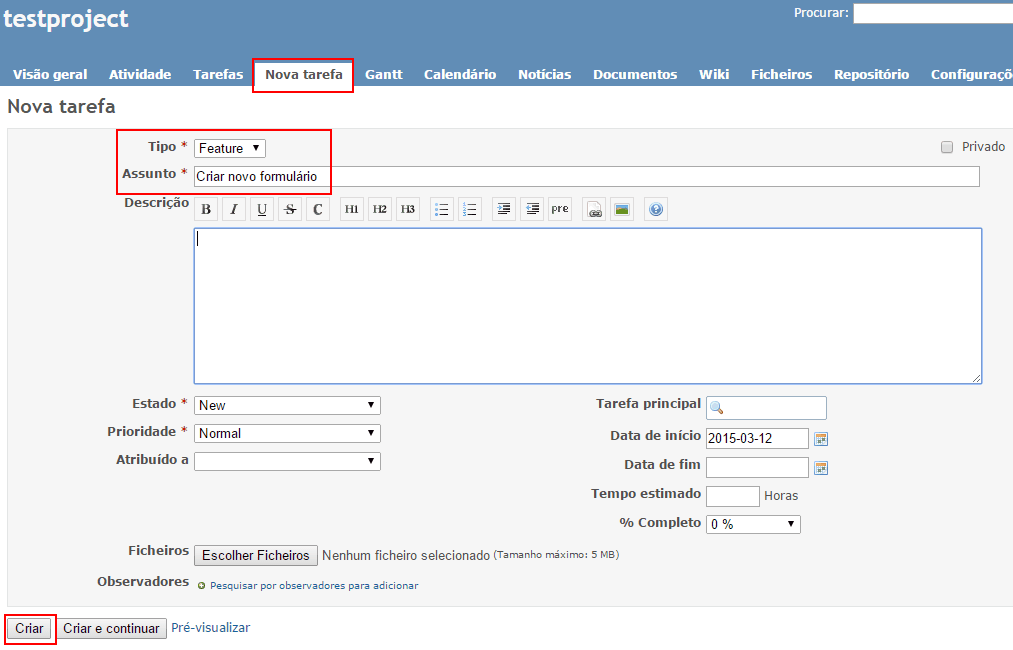
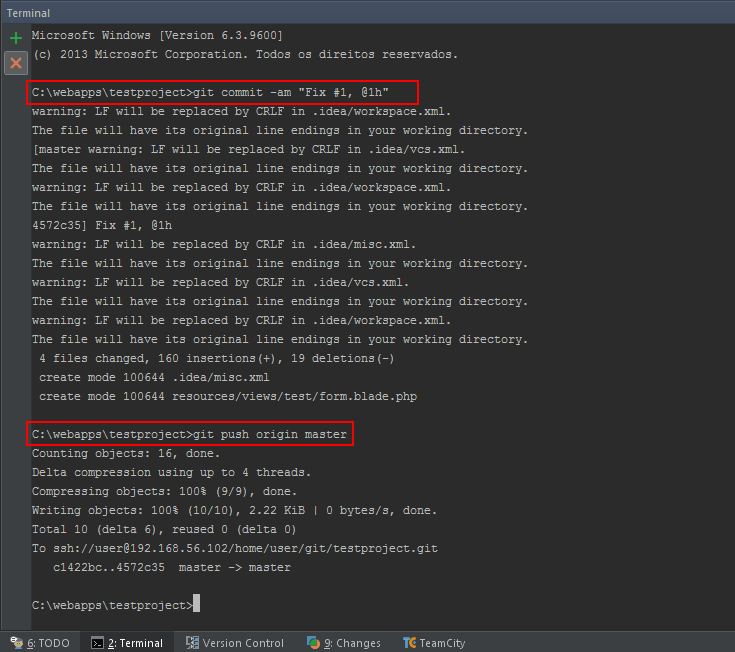
Now you’ll code whatever is specified on the task and you’ll commit and push with the message Fix #1. The quirks of this message:
- Fix is one of the keywords we defined
- #1 is the identifier of the task we created
There are more options for the commit message as you can see on Redmine’s documentation.
Let’s go back to the task on Redmine, where you should see the % done to 100% and the status as Closed.
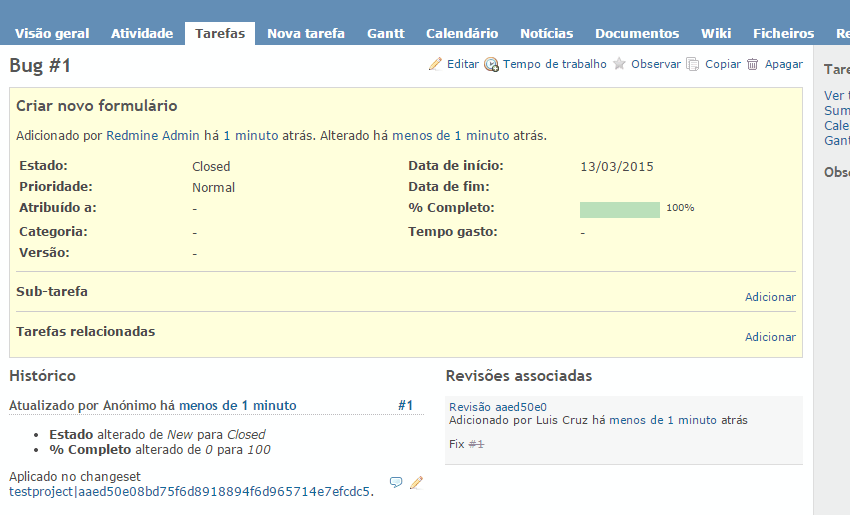
With this we can reference the tasks on the commits and we can track back from each point. Didn’t you ever wonder where the hell did that change came from? I have. That’s why it’s handy to be able to reference tasks with issues, especially if you have a code base with a few hundreds of thousands of lines of code.
If you have any question or doubt, you can access Redmine’s installation guide or drop us a line through the comments. There’s also a detailed guide to install Redmine on CentOS.
This article is a part of the series How to set up a Continuous Integration Server for PHP projects
- Tools for a Continuous Integration (CI) server for PHP projects
- Install SSH and Git on Linux and configure a Windows development machine
- Install Redmine and integrate it with Git - You are here
- Install and configure TeamCity 9
- Install and configure TeamCity Agent on Linux Mint
- Install SonarQube and SonarQube Runner on Linux Mint
- Analyse a Laravel 5 (PHP) project with SonarQube
- Integrate SonarQube with TeamCity and Redmine